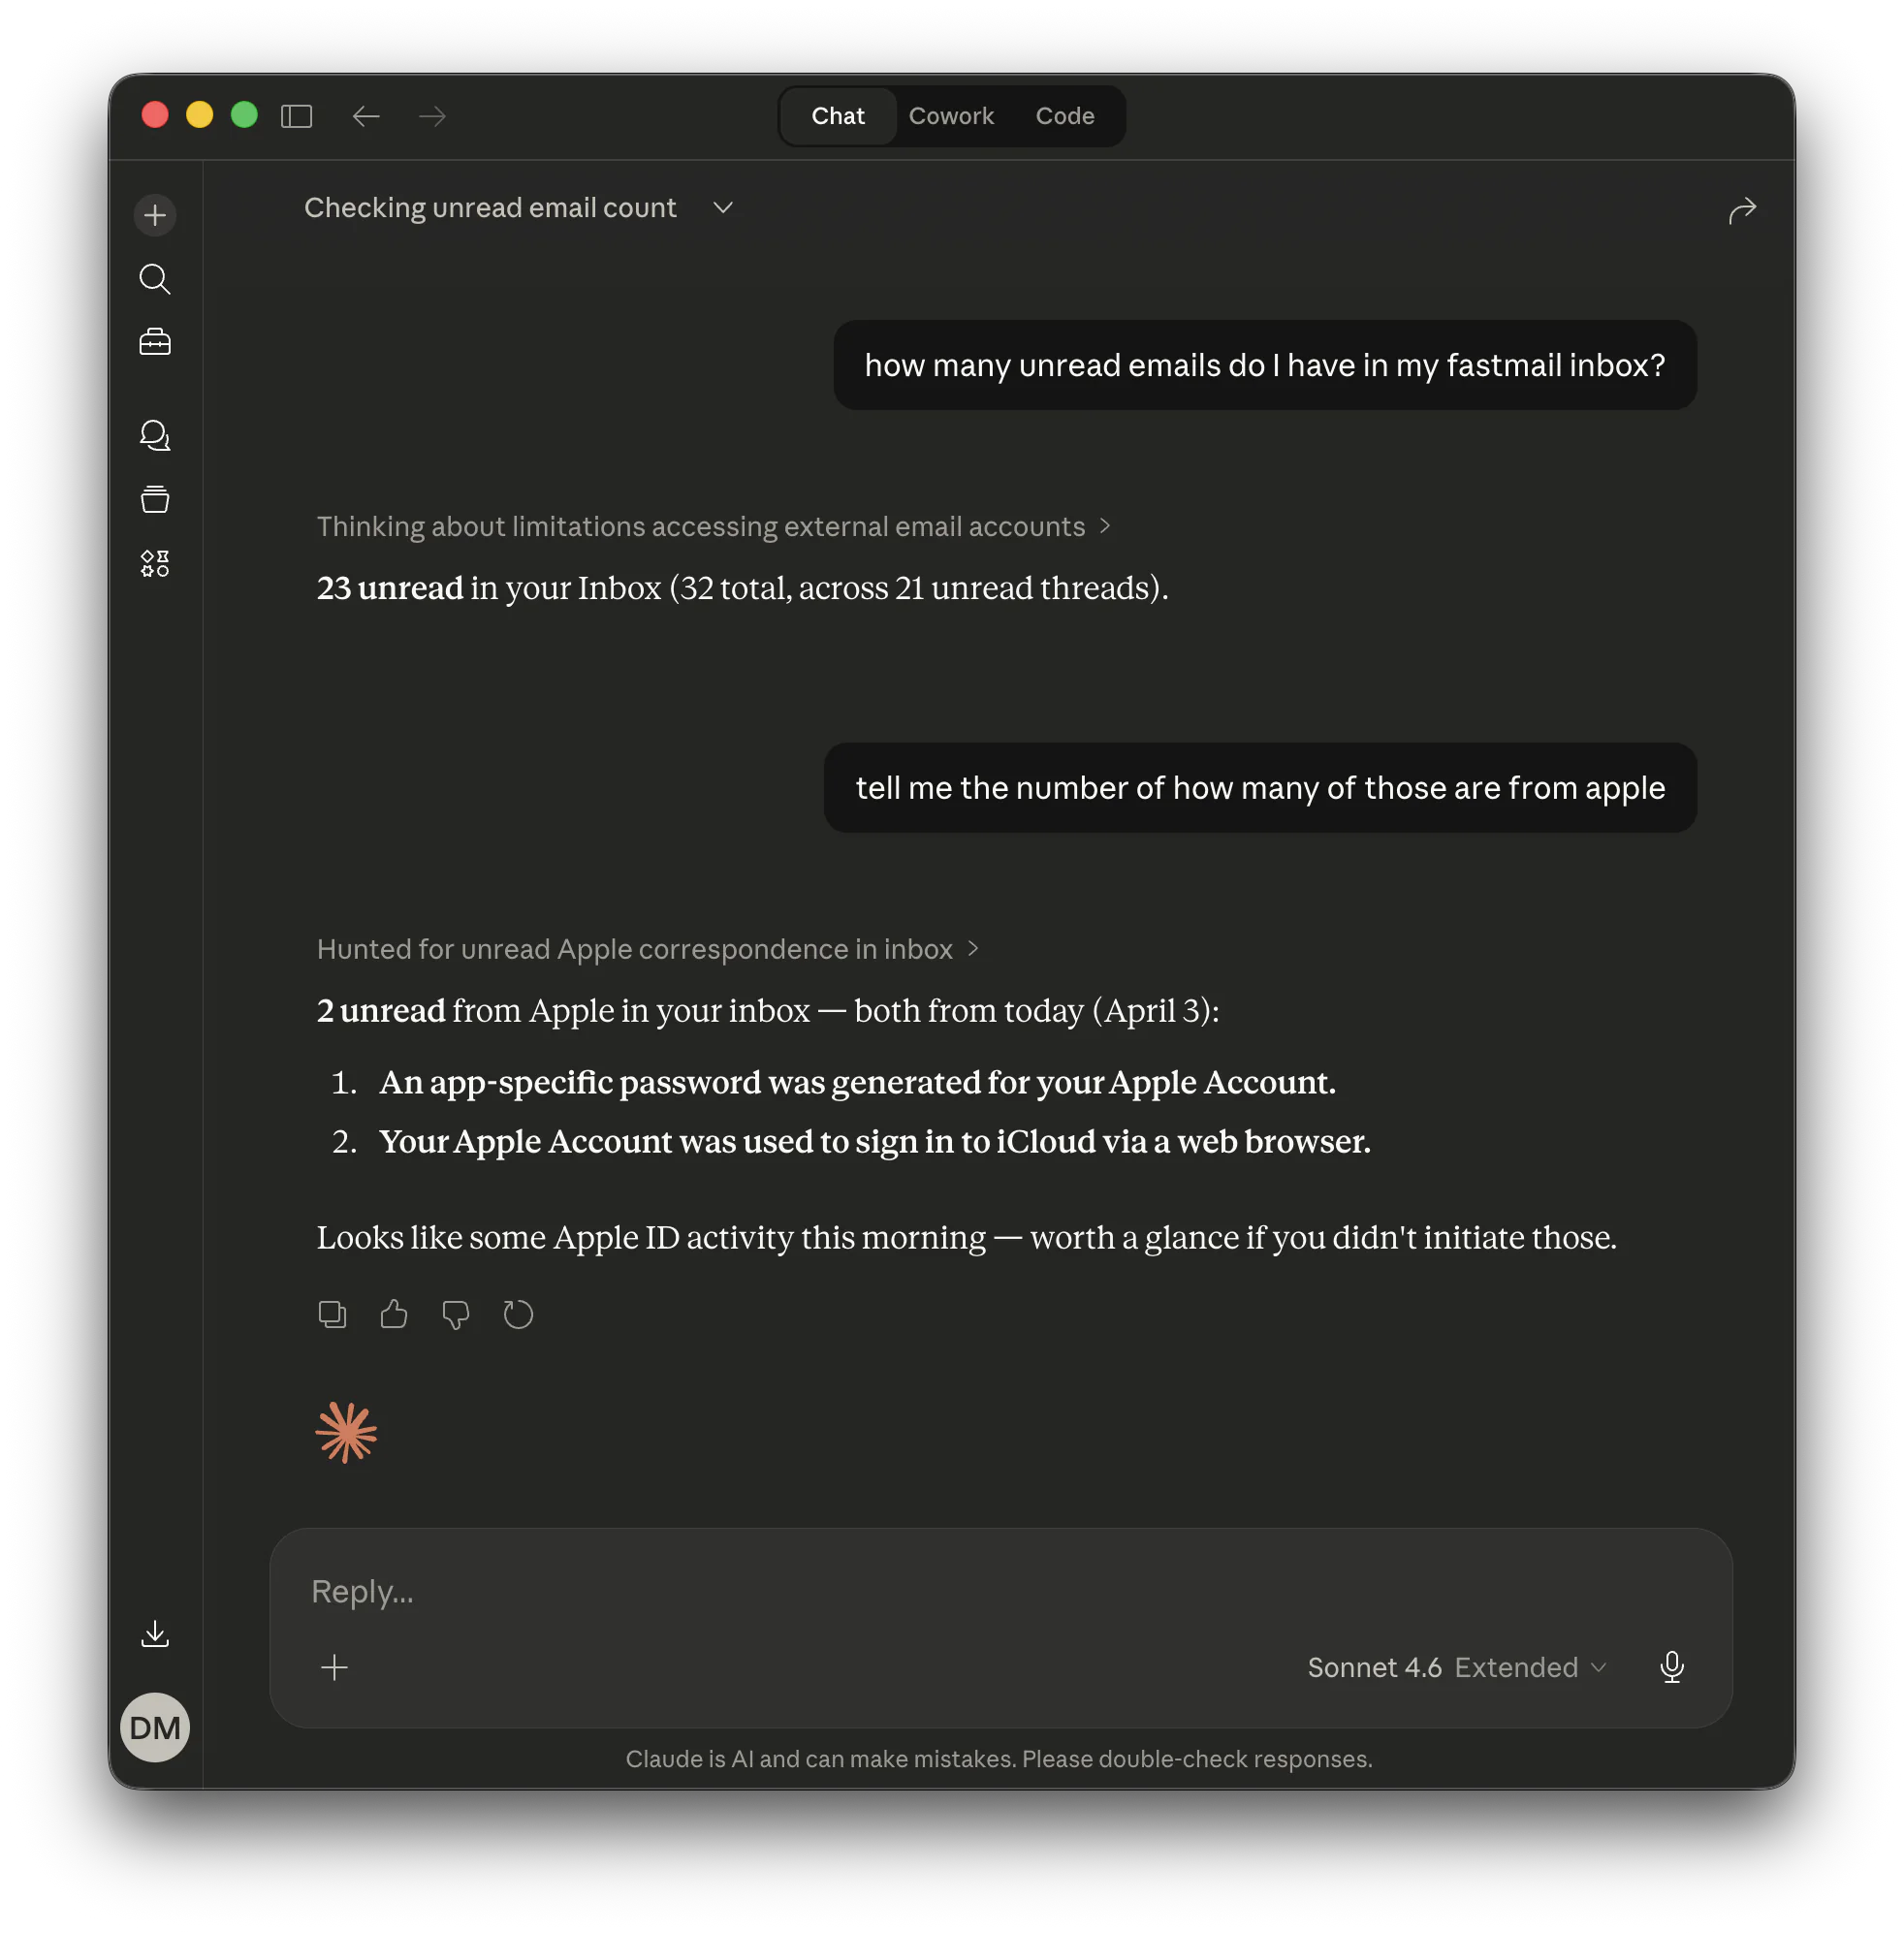
You can connect Fastmail to Claude, Perplexity, or ChatGPT by turning the Fastmail MCP server into a remote MCP connector with MCP Nest. The Fastmail MCP normally runs on your own machine over stdio, which no hosted AI assistant can reach. MCP Nest hosts it for you and gives you a single remote URL that Claude, ChatGPT, and Perplexity can all connect to.
This guide uses the MadLlama25/fastmail-mcp server, which talks to Fastmail over its JMAP API.
Quick Deploy
Deploy the Fastmail MCP server to MCP Nest with one click:

You will be prompted for your Fastmail API token before deploying.
What you can do with Fastmail in your AI assistant
Once the Fastmail MCP server is connected, your AI assistant can work directly with your mailbox. Typical things people ask for:
- “Search my Fastmail inbox for the invoice from last month and summarize it.”
- “Draft a reply to the latest email from Sam and keep it short.”
- “What unread emails do I have from this week that need a response?”
- “Send an email to [email protected] confirming the meeting on Thursday.”
- “Find the shipping confirmation and tell me the tracking number.”
Under the hood the server exposes tools to list your mailboxes, search and read messages, draft and send email, and look up contacts. Your assistant picks the right tool for each request, so you interact in plain language rather than calling the API yourself.
1. Create a Fastmail API token
The Fastmail MCP authenticates with a Fastmail API token, not your account password.
- Sign in to Fastmail on the web.
- Open Settings, then Privacy & Security.
- Find Connected apps & API tokens, choose Manage API tokens, then select New API token.
-
Give it a name you will recognize (for example,
MCP Nest), keep JMAP selected, and grant Email and Email submission access.
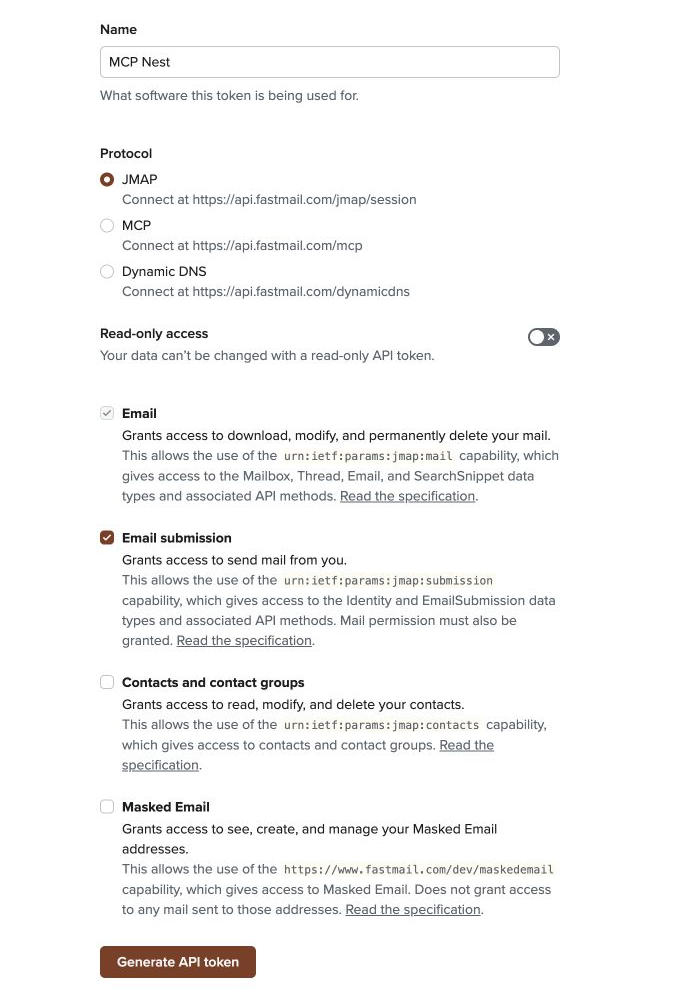
- Click Generate API token, then copy the token immediately. Fastmail shows it only once.
Keep this token private. Anyone who has it can read and send mail on your account, so treat it like a password and revoke it from the same screen if it is ever exposed.
2. Create a New Config in MCP Nest
Go to your MCP Nest dashboard and click Create MCP Deployment.
Command: npx
Args: github:MadLlama25/fastmail-mcp
Environment Variables:
| Variable | Value |
|---|---|
FASTMAIL_API_TOKEN |
The API token you generated above |
Save and deploy. MCP Nest builds and starts the Fastmail MCP server and exposes it at your remote MCP URL.
3. Connect to Claude, ChatGPT, or Perplexity
Once your Fastmail MCP is running on MCP Nest, connect it as a remote MCP connector.
Connecting to Claude
- Navigate to your Claude.ai connector settings page: https://claude.ai/settings/connectors.
- Click the Add Custom Connector button.
-
Fill in the details:
-
Name:
Fastmail via MCP Nest -
Remote URL:
https://mcp.mcpnest.dev/mcp(or your specific deployment URL provided by MCP Nest)
-
Name:
- Click Add, then click the Connect button next to it in the list to authorize the connection.
Connecting to ChatGPT
- Open your ChatGPT connector settings: https://chatgpt.com/#settings/Connectors.
- Click Advanced Settings and toggle Developer Mode. Custom MCP connectors are only offered behind this toggle.
-
Click Create to add a new MCP Server, then fill in the form:
-
Name:
Fastmail via MCP Nest - Server URL: in the MCP Nest dashboard, open the OAuth (Claude, Cursor, etc.) tab and copy the Streamable HTTP Endpoint. Do not use the SSE Endpoint (Legacy) field.
-
Authentication:
OAuth - Toggle: I trust this application
-
Name:
- Click Create and authorize the connection when MCP Nest prompts you.
- Developer Mode is per-conversation as well as per-account. In a new chat, enable Developer Mode to make the Fastmail tools available.
For more detail, see how to connect any MCP server to ChatGPT.
Connecting to Perplexity
- Navigate to your Perplexity account connectors page: https://www.perplexity.ai/account/connectors.
- Add a new custom connector.
- Provide your MCP Nest remote URL as the connection point.
- Authorize the connection when prompted.
Once connected, just ask your chosen AI assistant to read your inbox, draft a reply, or search your Fastmail email, and it will use the remote Fastmail MCP connector to do it.
Troubleshooting
The connector fails to connect, or shows no tools. A deployment still in progress returns a 404 status code rather than an empty tool list, which causes some clients to reject the endpoint. Wait until the MCP Nest dashboard shows the deployment as Active before adding or reconnecting the connector.
Authentication fails. Regenerate the Fastmail API token and update the FASTMAIL_API_TOKEN environment variable on your MCP Nest deployment. A token that was revoked or copied incompletely will fail silently.
The assistant will not send email. Some clients ask you to approve write actions the first time. Confirm the prompt, and make sure the API token was granted mail access when you created it.
Frequently asked questions
Do I need to keep my computer running? No. That is the point of hosting the Fastmail MCP on MCP Nest. The server runs in the cloud and stays reachable even when your machine is off.
Can I use the same deployment in Claude and ChatGPT at once? Yes. The remote URL works with any MCP-compatible client, so you can connect Claude, ChatGPT, and Perplexity to the same Fastmail MCP server.
Is my email data stored by MCP Nest? MCP Nest proxies requests between your AI assistant and the Fastmail MCP server. It does not keep a copy of your mailbox. See the privacy policy for details.