Cloudflare MCP Portals give you one Zero Trust endpoint for your AI clients, with Access policies, Code Mode, and per-server toggles. The catch is that Cloudflare only connects to remote HTTP MCP servers. It cannot run local npx or uvx stdio servers directly.
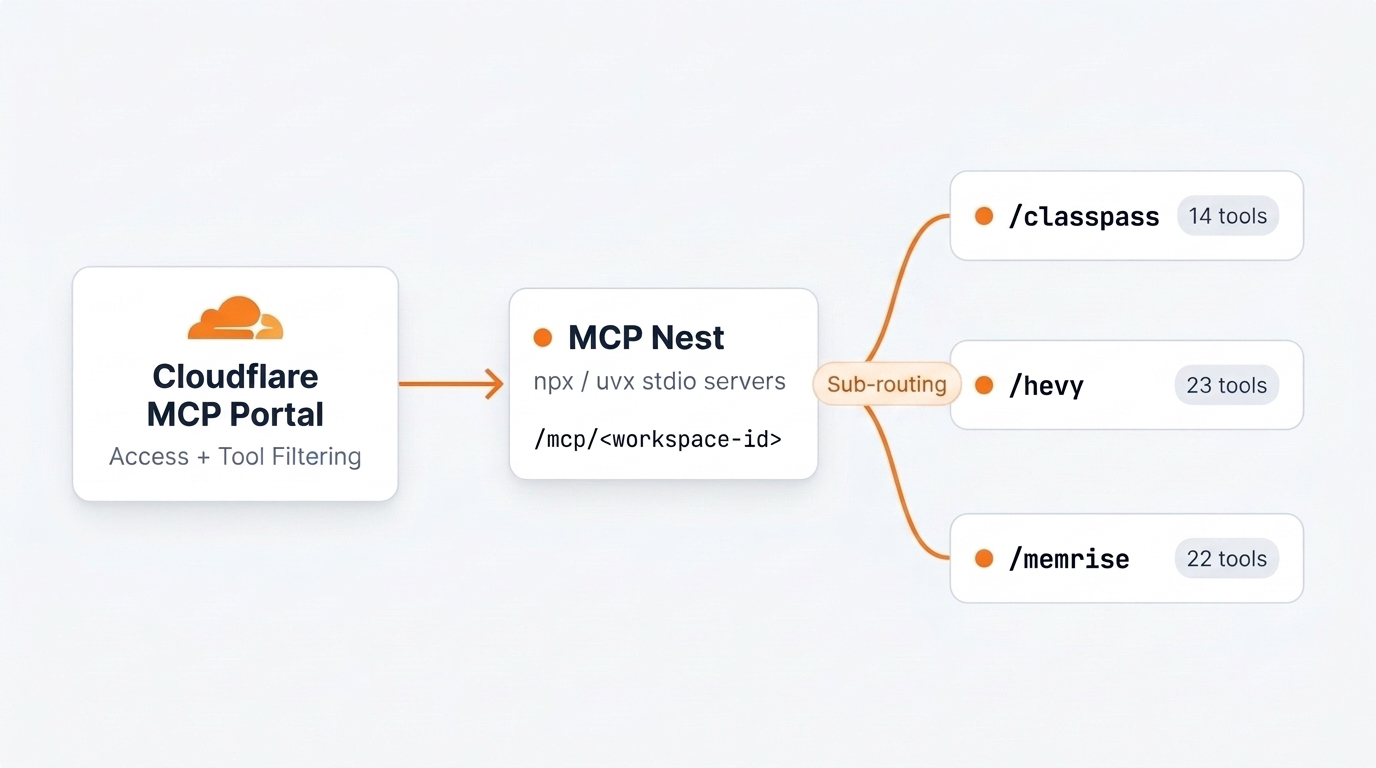
MCP Nest fills that gap. You run your npx and uvx servers in a single MCP Nest workspace, then use MCP server sub-routing to give each server its own HTTP URL inside your Cloudflare MCP Portal.
Why fan out with sub-routing
You can point Cloudflare at your root MCP Nest workspace URL, which bundles every server into one entry. Fanning out via sub-routing is usually better when you manage everything through a Cloudflare Portal:
-
Individual toggles: Enable or disable
classpass,hevy, ormemriseindependently from the portal instead of loading every tool at once. - Separate Access policies: Put stricter Zero Trust policies on write-heavy servers while leaving read-only tools broader.
- No tool collisions: Each Cloudflare server entry syncs only that server’s tools, without workspace management tools mixed in.
Authentication: use your MCP Nest API key (Bearer)
When Cloudflare MCP Portal connects to an upstream MCP server, it authenticates server-to-server using a static Bearer token rather than an interactive browser OAuth flow.
In MCP Nest, switch the endpoint bar (or the server card’s MCP Server Sub-routing panel) to the Token tab to get your API key and sub-route URL:
-
Endpoint URL:
https://mcp.mcpnest.dev/mcp/<workspace-id>/<server-name> -
Bearer token: the token value from the
?token=<your-token>URL (or your workspace API key)
Pass the clean sub-route URL as the server URL in Cloudflare, and put the token in Cloudflare’s Bearer token field. Avoid pasting ?token=... directly into the URL field so the secret is stored in Cloudflare’s encrypted credentials rather than the server hostname.
Step 1: Deploy your stdio servers in MCP Nest
Add the npx or uvx servers you want in your MCP Nest workspace, set their environment variables, and deploy the workspace.
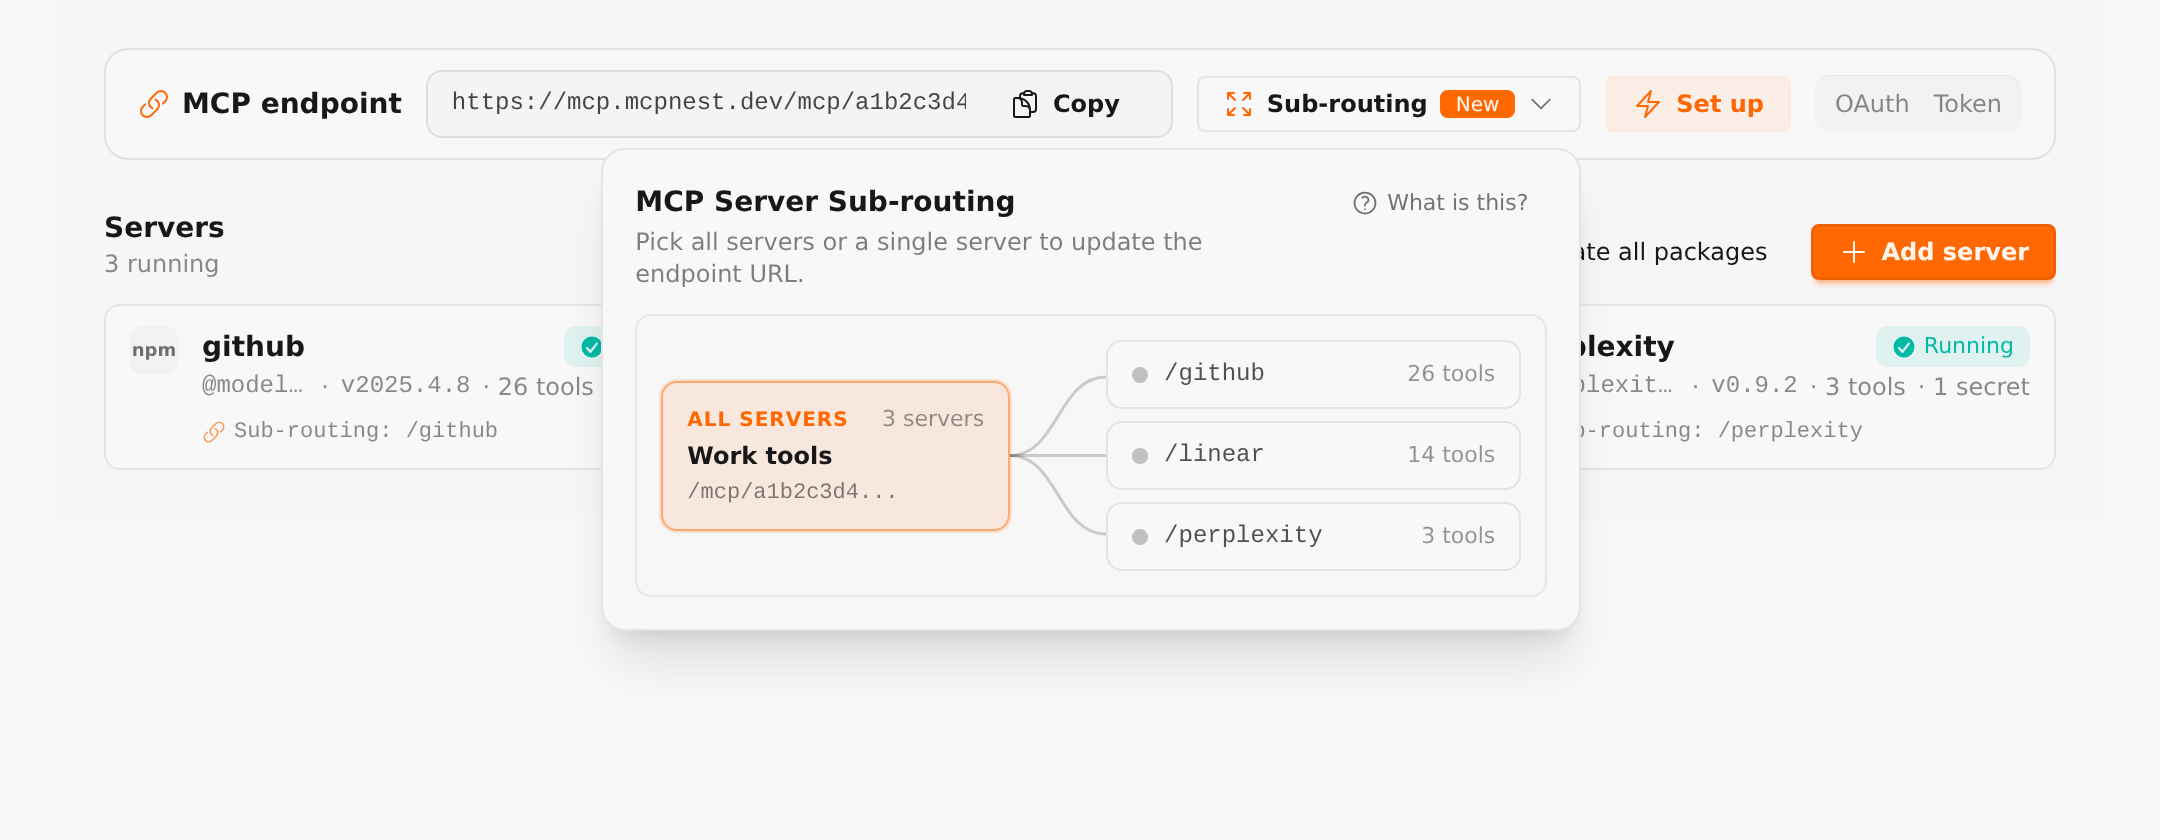
Once deployed, open the Sub-routing menu at the top of the workspace to confirm each server has its own route.
Step 2: Copy the sub-route URL and API token
- Click a server in the Sub-routing overlay (or click its card in the workspace).
- Switch to the Token tab so you can copy the workspace API token.
- Copy the clean sub-route URL without the query string:
https://mcp.mcpnest.dev/mcp/<workspace-id>/<server-name>

Step 3: Add each sub-route to Cloudflare MCP Portal
In the Cloudflare Zero Trust dashboard, go to Access > AI Controls:
- Open MCP Servers and click Add MCP Server.
-
Enter a name and ID (for example,
Hevy/hevy). -
Set the URL to the sub-route URL (
https://mcp.mcpnest.dev/mcp/<workspace-id>/hevy). - Under Authentication, choose Bearer and paste your MCP Nest API token.
- Save and click Sync capabilities to verify Cloudflare discovers only that server’s tools.
-
Attach an Access application and policy (
Allowor service token) for the new server, then add the server to your MCP Portal.
Repeat those steps for each sub-route you want exposed in the portal. All of them share the same MCP Nest container and API key, while Cloudflare manages each one as an independent server.